Getting a digital certificate from a commercial CA costs money, but we don’t have to go to that expense — we can become a root CA ourselves and issue certificates for ourselves.
In this lab we will become a root CA and generate a certificate for that CA. Unlike other CAs, which need to be certified by another CA, a root CA’s certificate is certified by itself. Root CA certificates are generally already loaded in most operating systems, browsers, or software that depends on PKI. A root CA’s certificate is trusted unconditionally.
Configuration file: openssl.conf
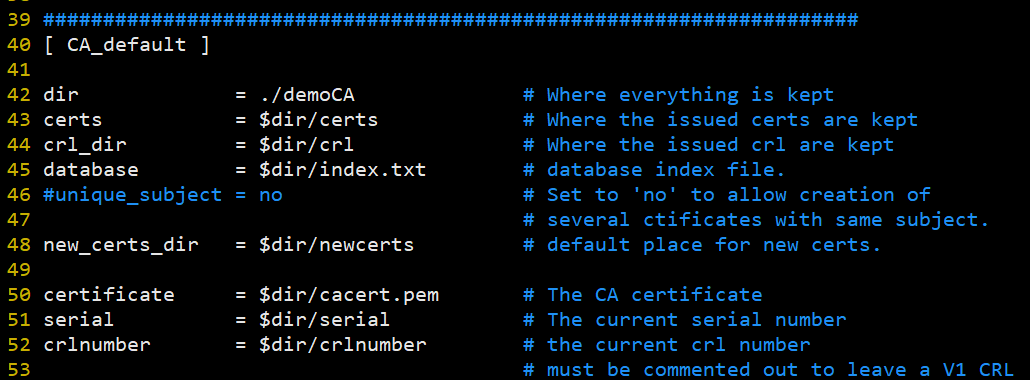
To generate certificates with openssl, we first need to configure things, and the configuration file has a .cnf extension. openssl’s ca, req and x509 commands often use this configuration file. You can get a copy from /usr/lib/ssl/openssl.cnf. After copying the file to the working directory, create the subdirectories specified in the configuration file (see the [CA default] section of the configuration file for details).
First let’s create a working directory:
$ cd /home/shiyanlou
$ mkdir openssl
$ cd openssl
The directories and file configuration you need can all be found in openssl.cnf:1
2
3
4
5
6dir = ./demoCA # Where everything is kept
certs = $dir/certs # Where the issued certs are kept
crl_dir = $dir/crl # Where the issued crl are kept
new_certs_dir = $dir/newcerts # default place for new certs.
database = $dir/index.txt # database index file.
serial = $dir/serial # The current serial number
Screenshot of the relevant configuration in openssl.cnf:
In the working directory we need to create the following directories and files; here is the directory tree:1
2
3
4
5
6
7
8|-- demoCA
| |-- certs
| |-- crl
| |-- index.txt
| |-- newcerts
| `-- serial
`-- openssl.cnf
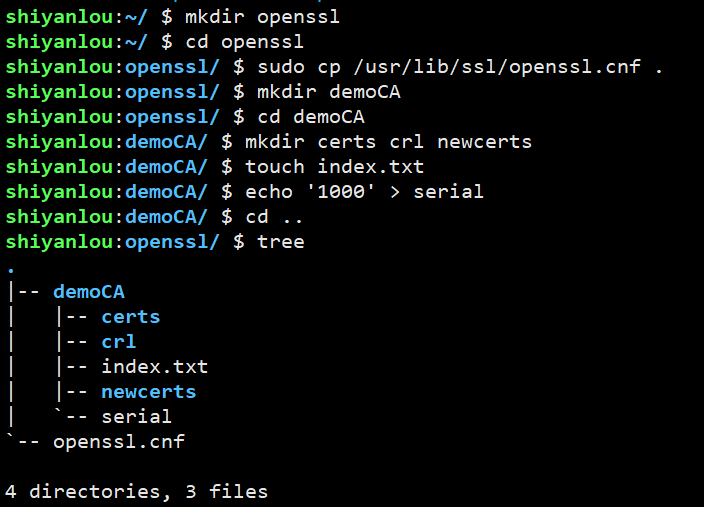
index.txt just needs to be an empty file; as for the serial file, its content must be a number in string format (for example, 1000)
The specific commands are as follows:1
2
3
4
5
6
7$ sudo cp /usr/lib/ssl/openssl.cnf .
$ mkdir demoCA
$ cd demoCA
$ mkdir certs crl newcerts
$ touch index.txt
$ echo '1000' > serial
$ cd ..
Once you have openssl.cnf set up, you can create and issue certificates.
Certification Authority (CA)
We need to generate a self-signed certificate for our own CA. This means the authority is trusted and its certificate serves as the root certificate. You can run the following command to generate a self-signed certificate for the CA:1
2$ openssl req -new -x509 -keyout ca.key -out ca.crt -config openssl.cnf
It asks you for information and for a password, and whatever you do don’t forget the password (the password I entered here is shiyanlou), because you’ll need it every time you sign a certificate for someone else. The information includes city name, common name and so on. The command’s output is stored in two files: ca.key and ca.crt. The file ca.key contains the CA’s private key, while ca.crt contains the public key certificate.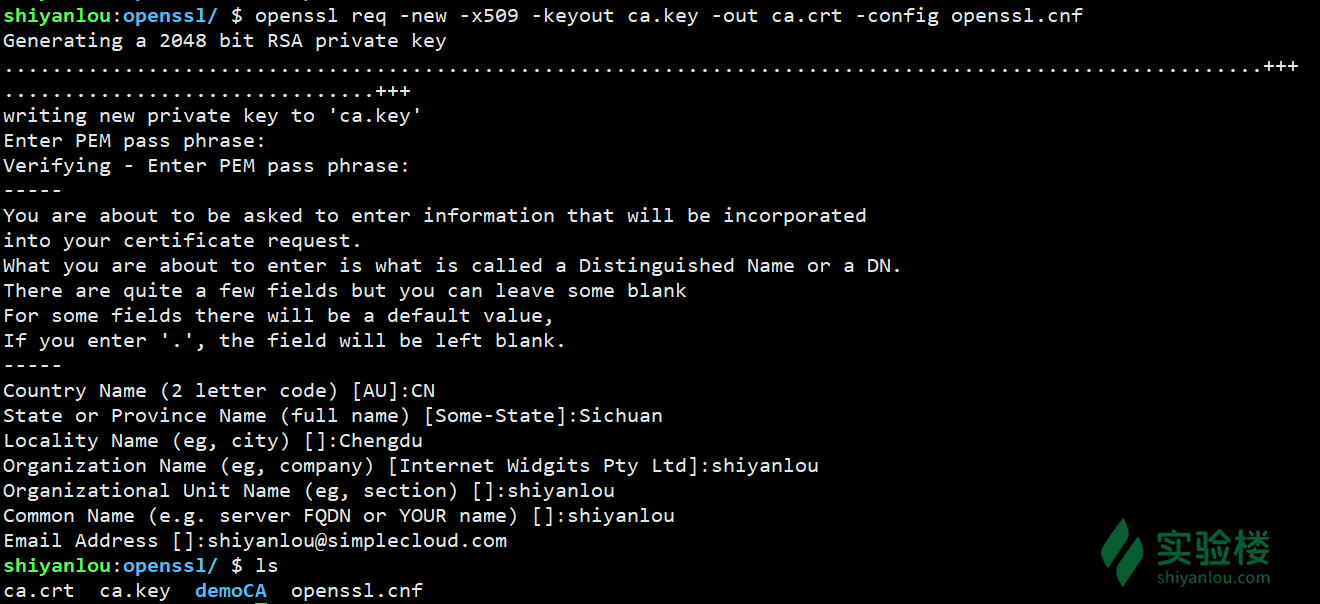
Now we are a root CA, and we are ready to sign digital certificates for our customers. Our first customer is a company called PKILabServer.com, and it takes 3 steps for this company to obtain a digital certificate from the CA:
- Generate a public/private key pair
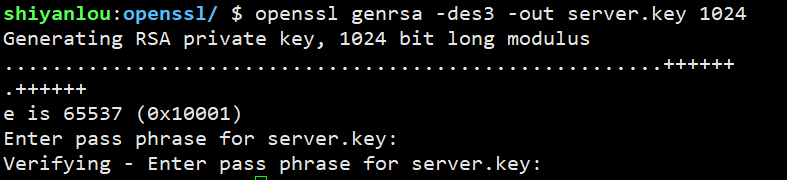
The company first needs to generate its own public/private key pair. We run the following command to generate an RSA key pair. You also need to provide a password to protect your key (the password I set here is pkilab). The key will be saved in the server.key file.1
2$ openssl genrsa -des3 -out server.key 1024
- Generate a certificate signing request
Once the company has the key file, it should generate a certificate signing request (CSR). The CSR will be sent to the CA, and the CA will generate a certificate for that request (usually after confirming that the identity information in the CSR matches). Please use PKILabServer.com as the common name of the certificate request, and please remember what you entered.1
2
3
$ openssl req -new -key server.key -out server.csr -config openssl.cnf
The password entered at the very beginning is the password we set above (pkilab)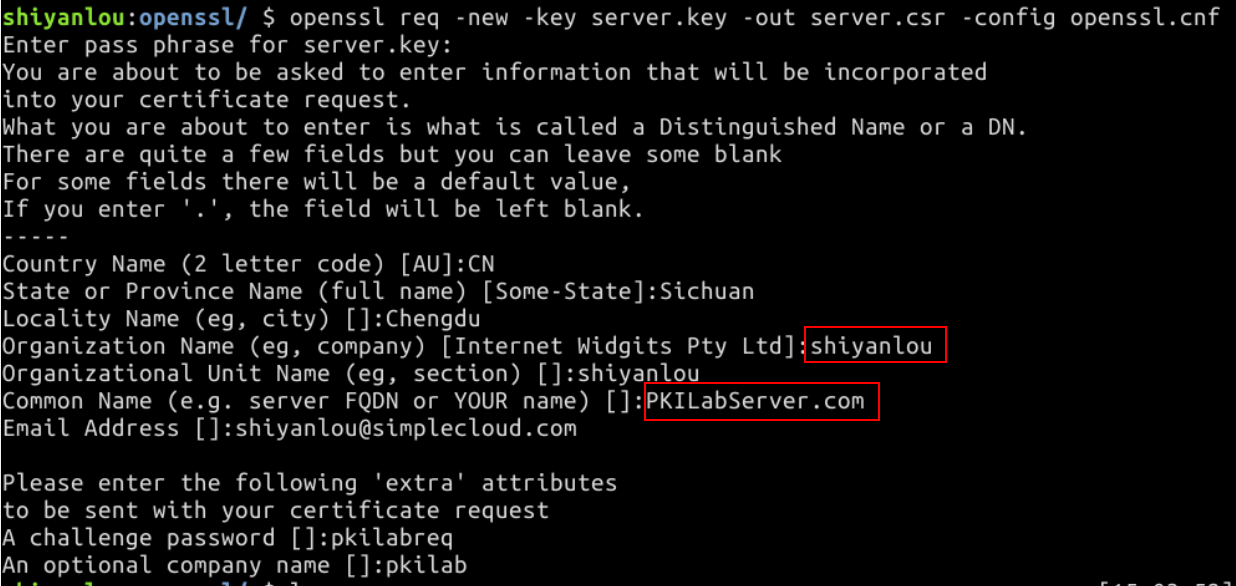
- Generate the certificate
Generating the certificate. The CSR file needs to carry the CA’s signature to constitute a certificate. In the real world, CSR files are usually sent to a trusted CA for signing. In this lab we will use our own CA to generate the certificate:1
2$ openssl ca -in server.csr -out server.crt -cert ca.crt -keyfile ca.key -config openssl.cnf
The password entered is the one we set in the first step (shiyanlou)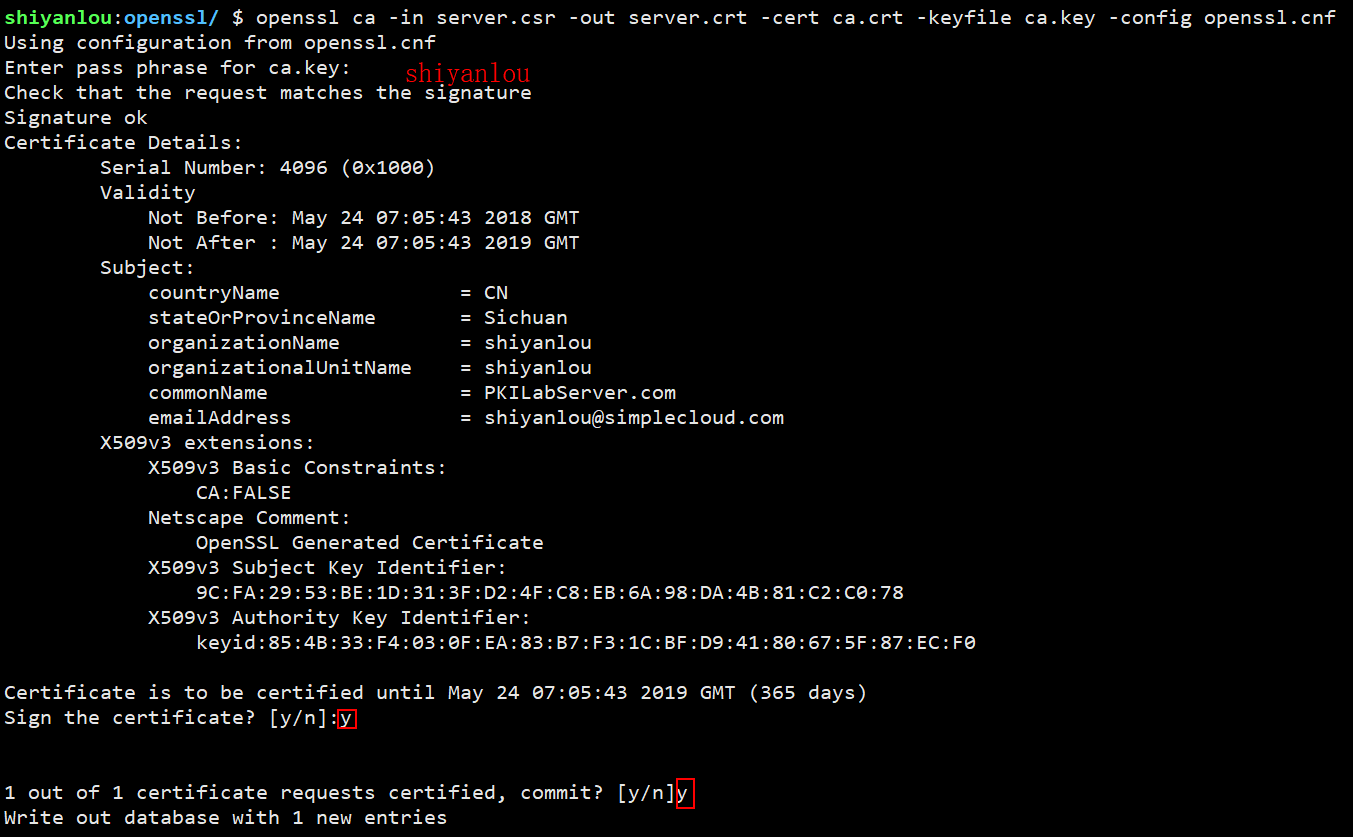
If OpenSSL refuses to generate the certificate, it’s most likely because the name in your request doesn’t match what the CA holds. The matching rules are specified in the configuration file (the [policy match] section), and you can either change the name or change the rules. We’ve come this far, so change the rules.
The directory structure at this point is as follows:1
2
3
4
5
6
7
8
9
10
11
12
13
14.
|-- ca.crt
|-- ca.key
|-- demoCA
| |-- certs
| |-- crl
| |-- index.txt
| |-- newcerts
| `-- serial
|-- openssl.cnf
|-- server.crt
|-- server.csr
`-- server.key